PowerPoint Animation Tutorial: Add Motion to Your Slides
PowerPoint animations bring your slides to life by controlling how text, images, charts, and shapes…
PowerPoint animations bring your slides to life by controlling how text, images, charts, and shapes appear, move, and disappear during a presentation. Used well, animations guide your audience’s attention and make complex information easier to follow. If you are new to PowerPoint, start with our PowerPoint tutorial for beginners first.
Key Takeaways
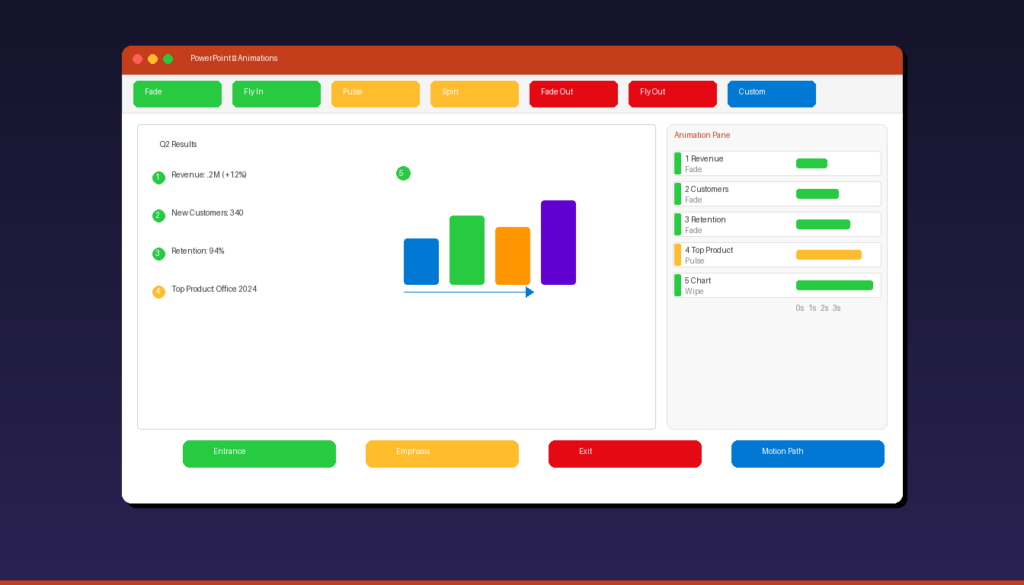
- PowerPoint offers four animation types: Entrance (green — objects appear), Emphasis (yellow — objects highlight), Exit (red — objects disappear), and Motion Path (blue — objects move across the slide).
- Use the Add Animation button to apply multiple effects to one object — clicking directly in the Animations gallery replaces the existing animation instead of adding a new one.
- The Animation Pane (Animations tab > Animation Pane) gives you precise control over timing, sequencing, and triggers for every animation on the slide.
What Are the Four Types of PowerPoint Animations?
PowerPoint animations are divided into four categories — Entrance, Emphasis, Exit, and Motion Path — each color-coded in the ribbon for quick identification.
| Type | Color | Purpose | Common Effects |
|---|---|---|---|
| Entrance | Green | Makes objects appear on the slide | Fade, Fly In, Zoom, Bounce, Appear |
| Emphasis | Yellow | Highlights objects already on the slide | Pulse, Grow/Shrink, Spin, Color Change |
| Exit | Red | Makes objects disappear from the slide | Fade Out, Fly Out, Shrink, Dissolve |
| Motion Path | Blue | Moves objects along a path across the slide | Lines, Arcs, Turns, Custom Path |
Each category contains dozens of individual effects. Click More (the dropdown arrow) at the end of each category in the Animations gallery to see all available options.
How Do I Add an Animation to an Object in PowerPoint?
Select the object you want to animate, go to the Animations tab, and click the effect you want — the animation previews immediately on the slide.
Step-by-Step
- Click the text box, image, shape, or chart you want to animate.
- Go to the Animations tab in the ribbon.
- Browse the animation gallery and click an effect:
- Green effects = Entrance (object appears)
- Yellow effects = Emphasis (object highlights)
- Red effects = Exit (object disappears)
- The animation previews automatically on the slide.
- A number badge appears next to the object showing its animation order.
Add Multiple Animations to One Object
To add a second animation without replacing the first:
- Select the object that already has an animation.
- Click Add Animation (not the gallery — the Add Animation button to the right).
- Choose the additional effect.
- Both animations now apply to the same object in sequence.
Common mistake: Clicking directly in the animation gallery replaces the current animation. Always use Add Animation for additional effects.
How Do I Use the Animation Pane?
Open the Animation Pane from the Animations tab to see all animations on the current slide — reorder, adjust timing, and set triggers for precise control.
- Go to Animations tab > click Animation Pane (right side of ribbon).
- The pane opens on the right, listing all animations in order.
Animation Pane Controls
| Action | How |
|---|---|
| Reorder animations | Drag animations up/down in the list |
| Change timing | Click the dropdown arrow > Timing |
| Preview single effect | Click the animation > click Play |
| Preview all | Click Play All at the top of the pane |
| Delete animation | Right-click > Remove |
| Duplicate timing | Right-click > Copy, then paste on another object |
Timing Options
Each animation has three timing properties:
| Property | Options | When to Use |
|---|---|---|
| Start | On Click, With Previous, After Previous | Control when the animation begins |
| Duration | 0.25s to 5s+ (or custom) | Control how long the animation takes |
| Delay | 0s to any value | Add a pause before the animation starts |
On Click: Animation plays when you click the mouse or press a key — use for controlled, presenter-paced reveals.
With Previous: Animation starts at the same time as the previous animation — use for simultaneous effects (e.g., text appears while an image fades in).
After Previous: Animation starts automatically after the previous animation finishes — use for sequential reveals without manual clicking.
How Do I Create Motion Path Animations?
Select an object, go to Animations > Motion Paths, choose a preset path or draw a custom one — the object moves along the path during the presentation.
Preset Motion Paths
- Select the object.
- Go to Animations tab > click the dropdown arrow in the gallery.
- Scroll to Motion Paths (blue section).
- Choose a preset: Lines, Arcs, Turns, Shapes, Loops.
- A dotted path appears on the slide showing the movement route.
Custom Motion Paths
For precise control over object movement:
- Select the object.
- Go to Animations > Add Animation > scroll to Motion Paths > Custom Path.
- Click on the slide to set points along the path.
- Double-click to finish the path.
- Adjust the path by dragging the control points.
Motion Path Tips
| Tip | Details |
|---|---|
| Green arrow | Starting position of the object |
| Red arrow | Ending position of the object |
| Drag endpoints | Resize or redirect the path |
| Lock/unlock | Right-click path > Lock Position to prevent accidental moves |
| Smooth path | Right-click a point > Smooth Point for curved motion |
| Reverse | Effect Options > Reverse Path Direction |
Motion paths work well for showing processes (objects moving through a workflow), geographical movement (icons moving across a map), or data visualization (elements transitioning between states).
How Do I Animate Text Line by Line?
Click the text box, add an Entrance animation, then use Effect Options to set “By Paragraph” — each bullet point or paragraph appears separately with each click.
- Click the text box containing multiple bullet points.
- Go to Animations tab > select an Entrance effect (e.g., Fade or Appear).
- Click Effect Options in the ribbon.
- Select By Paragraph (or By 1st Level Paragraphs for bulleted lists).
- Each paragraph or bullet point now animates separately.
Text Animation Options
| Option | Behavior |
|---|---|
| As One Object | Entire text box animates at once |
| All At Once | All paragraphs animate simultaneously |
| By Paragraph | Each paragraph animates separately (one click per paragraph) |
| By Word | Each word animates individually (dramatic but slow) |
| By Letter | Each letter animates individually (typewriter effect) |
For most presentations, By Paragraph is the best choice — it lets you reveal bullet points one at a time, keeping the audience focused on the current point rather than reading ahead.
What Is the Morph Transition and How Does It Compare to Animations?
Morph is a slide-level transition (not an animation) that automatically animates differences between two slides — moving, resizing, and transforming objects without manual animation setup.
How Morph Works
- Create Slide 1 with your objects in their starting positions.
- Duplicate the slide (Ctrl+D).
- On Slide 2, move, resize, recolor, or reshape the objects to their ending positions.
- Select Slide 2 and go to Transitions tab > Morph.
- During the presentation, PowerPoint automatically animates the differences between the two slides.
Morph vs Animations
| Feature | Animations | Morph Transition |
|---|---|---|
| Applied to | Individual objects | Entire slide transition |
| Setup effort | Manual per-object | Automatic (duplicate + rearrange) |
| Effect types | Entrance, Exit, Emphasis, Path | Move, resize, transform, recolor |
| Timing control | Per-object (Animation Pane) | Single transition duration |
| Best for | Precise, sequenced reveals | Smooth object repositioning |
| Availability | All PowerPoint versions | Microsoft 365, PowerPoint 2019+ |
Use Morph when you need smooth object movement between states. Use animations when you need precise timing, sequenced reveals, or effects that Morph cannot produce (like entrance/exit effects).
What Are PowerPoint Animation Best Practices?
Limit animations to 2-3 per slide, use consistent timing across the presentation, and choose effects that serve a purpose — decorative animations distract rather than enhance.
Do
| Practice | Why |
|---|---|
| Use Fade for text reveals | Clean, professional, non-distracting |
| Animate charts data series by series | Helps audience absorb data progressively |
| Use consistent timing | 0.5s-1s duration feels natural |
| Match animation to content | Fly In from left for sequential processes |
| Use After Previous for auto-play | Smooth automatic sequences |
Avoid
| Mistake | Why |
|---|---|
| Bounce, Swivel, Spin on text | Unprofessional, distracting |
| Sound effects on animations | Annoying, breaks focus |
| Animating every single object | Slows the presentation, frustrates audience |
| Inconsistent animation styles | Different effects on similar elements look chaotic |
| Long durations (3s+) | Audience loses patience waiting |
The goal of animation is to guide attention, not entertain. A well-animated presentation feels natural — the audience notices the content, not the effects.
For creating presentations from scratch, see our PowerPoint tutorial for beginners. If you need PowerPoint with full animation capabilities, Microsoft Office 2024 Professional Plus ($199.99) includes the complete PowerPoint desktop application with all animation effects and Morph transition.
Frequently Asked Questions
How many animations can I add to one object in PowerPoint?
There is no hard limit on the number of animations per object. However, for practical purposes, 2-3 animations per object is the recommended maximum — typically one Entrance, one Emphasis, and one Exit. Use the Animation Pane to manage complex sequences and ensure animations do not conflict with each other.
Can I animate charts and SmartArt in PowerPoint?
Yes. Click the chart or SmartArt, add an animation, then click Effect Options to choose how the elements animate: As One Object (all at once), By Series (one data series at a time for charts), By Category (one category at a time), or By Element in Series. Animating charts by series is particularly effective for data-heavy presentations.
How do I copy animations from one object to another?
Use the Animation Painter: select the object with the animation you want to copy, go to the Animations tab, click Animation Painter (paintbrush icon), then click the target object. Double-click Animation Painter to apply the same animation to multiple objects consecutively.
Why is my animation not playing during the slideshow?
Check three things: (1) The animation trigger is set to On Click but you are not clicking — change to With Previous or After Previous for automatic play. (2) The animation order in the Animation Pane may be wrong — reorder by dragging. (3) The object may be off-screen — check its position on the slide.
by Editorial Team
Updated on April 5, 2026
by Editorial Team
Updated on April 5, 2026
ON THIS PAGE